Backend Setup
Turning WordPress into a Headless CMS isn't straightforward, so grab a cup of ☕️ because following these steps will take ~20 minutes.
The following instructions assume you'll be standing up a fresh local install of WordPress.
Requirements
Make sure you have the following dependencies:
- Composer
- Gravity Forms
- Local WP (or Docker or VVV or whatever you prefer as a WordPress development tool)
WordPress Setup
Step 1: Install WordPress
Create a new WordPress install. We recommend the following settings:
- Either NGINX or Apache
- PHP 7.4+
- MySQL 5.7+
- Enable SSL certificate
Step 2: Install Plugins and Theme
Now that you've got a local WordPress install, it's time to turn it into a Headless CMS!
- In your terminal, change directories to your new WordPress install's
/wp-contentdirectory, then download ourcomposer.json.
curl -O https://raw.githubusercontent.com/WebDevStudios/nextjs-wordpress-starter/main/backend/composer.json
- Install free plugins and the theme:
composer install
Install premium plugin: Gravity Forms.
Activate all plugins and theme in the WP Dashboard or use WP CLI:
wp plugin activate --all
wp theme activate wds-headless-theme
Step 3: Configure wp-config.php
The follow constants needs to be in wp-config.php:
define( 'HEADLESS_FRONTEND_URL', 'http://localhost:3000/' );
define( 'PREVIEW_SECRET_TOKEN', 'ANY_RANDOM_STRING');
define( 'GRAPHQL_JWT_AUTH_SECRET_KEY', 'ANY_RANDOM_STRING' );
To generate a random strings, we recommend using the WordPress Salt Generator. Just copy and paste any of the generated strings into the constants above.
Learn more about setting up wp-config.php.
Step 4: Create Pages
In the WordPress Dashboard, navigate to Pages -> Add New
Create three blank pages named:
- Homepage
- Blog
- 404
There's nothing else needed for this step.
Step 5: Set Page Options
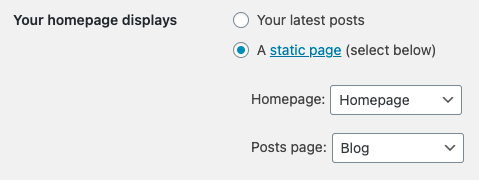
In the WordPress Dashboard, navigate to Settings -> Reading -> "Your homepage displays" and set static pages for Homepage and Posts page:
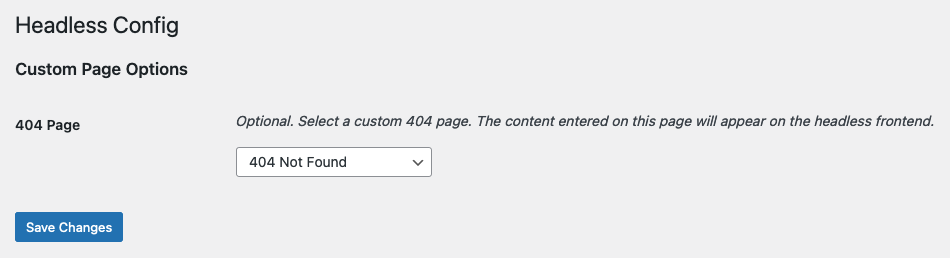
Now navigate to Settings -> Headless Config -> Custom Page Options and set the custom 404 page:
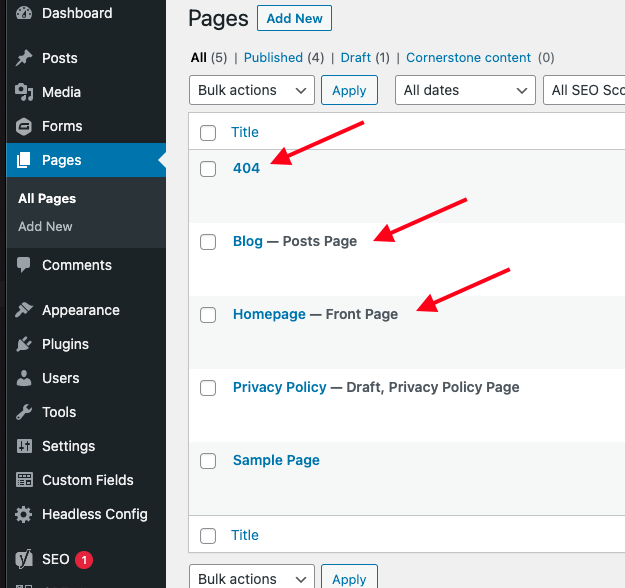
You should now see your Homepage, Blog, and 404 page like so:
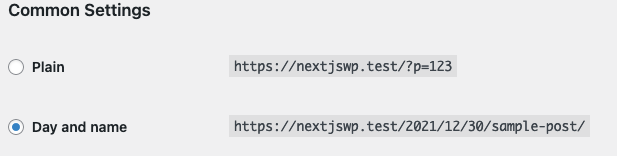
Step 6: Set Permalinks
In the WordPress Dashboard, navigate to Settings -> Permalinks
- Select the
Day and namestructure:
/%year%/%monthnum%/%day%/%postname%/
- Save the settings.
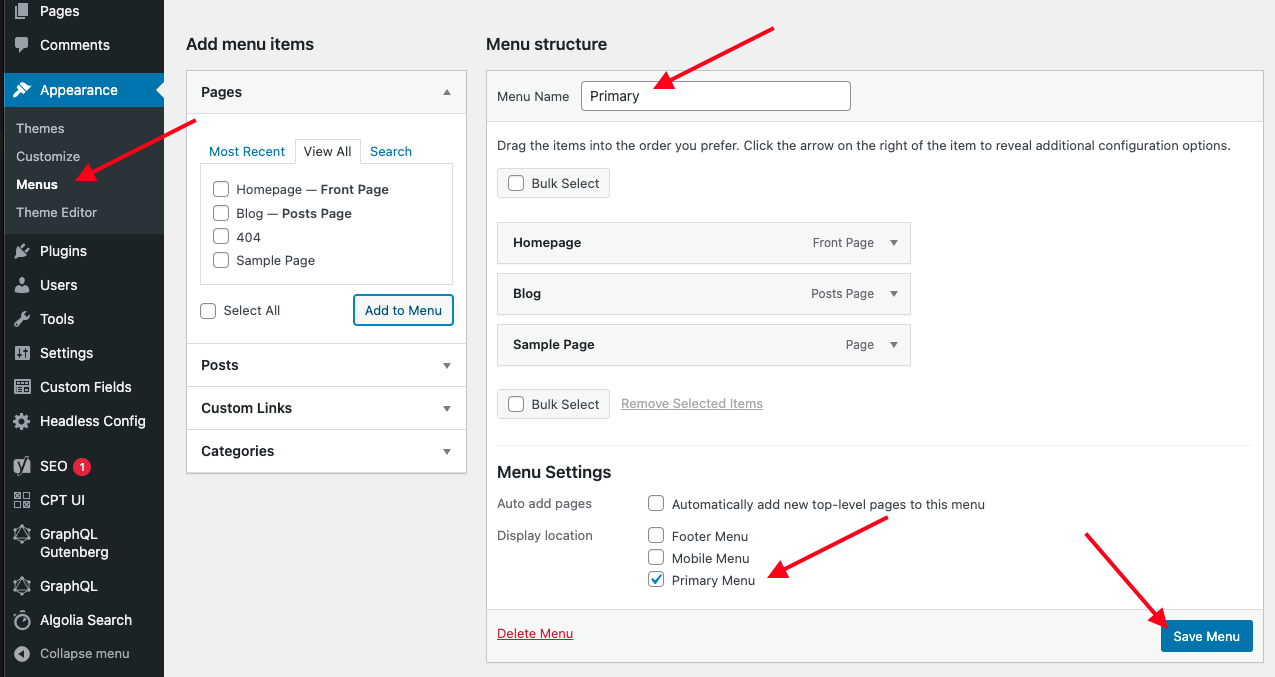
Step 7: Set Menus
You'll need to create at least one menu, Primary. Additionally, you can create a Mobile and Footer menu. In the WordPress Dashboard, navigate to Appearance -> Menus
- Menu Name:
Primary - Display location:
Primary Menu - Click "Save Menu"
- Add menu items as needed
Plugins Setup
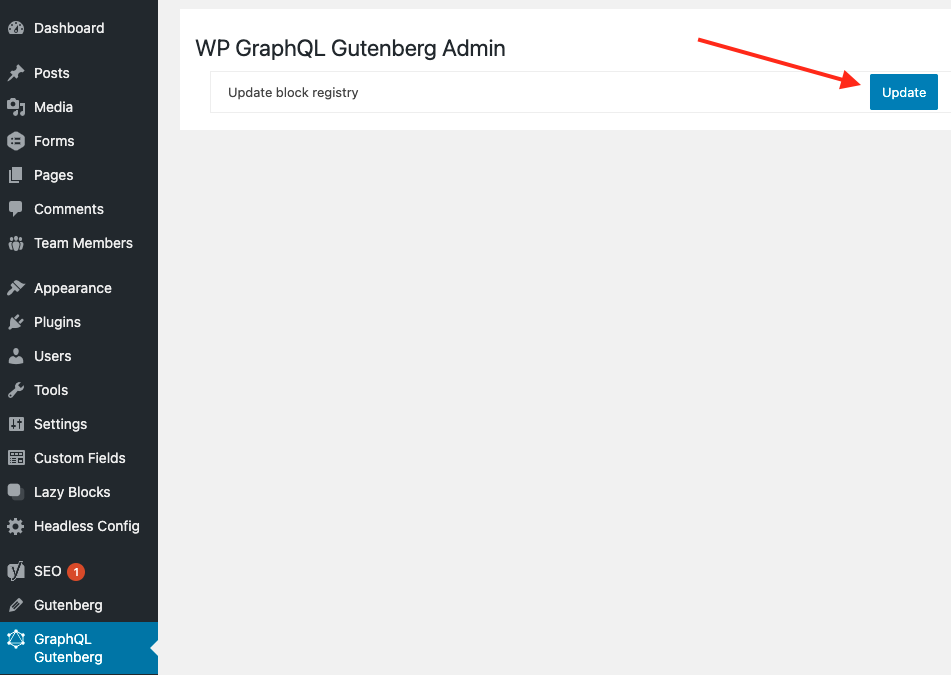
Update Block Registry
In order for the WP GraphQL Gutenberg plugin to create blockJSON, you'll need to click this button to update the block registry:
GraphQL Gutenberg -> Update
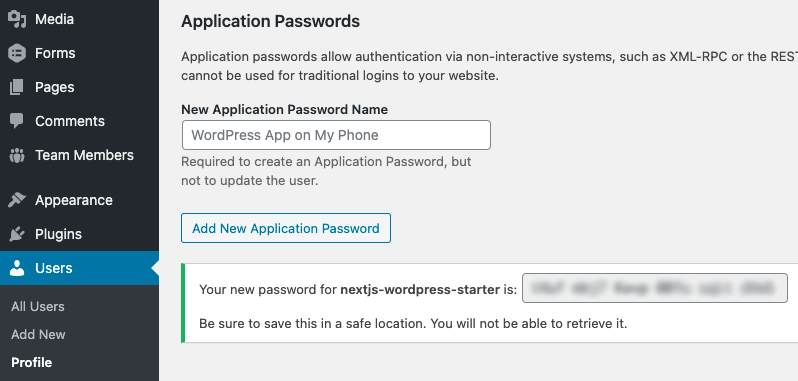
Application Password
The frontend will need to authenticate with WordPress, we can use Application Passwords.
Users -> Profile -> Scroll to the bottom- Enter a name, e.g,
nextjs-wordpress-starter Click -> Add New Application Password
Copy and paste the password into a safe location. You will need to add both your WordPress username and Application password to the .env file for the frontend. Learn more about ENV Variables.
WP Search with Algolia
See the WDS Headless Algolia documentation.
Gravity Forms
See the WDS Headless Gravity Forms documentation.
Enable Previews
To enable previews, you'll need both a PREVIEW_SECRET_TOKEN constant in wp-config.php and WORDPRESS_PREVIEW_SECRET ENV variable in the frontend .env file.
The token can be any random string, as long as they match in both locations!
WordPress:
// wp-config.php
define('PREVIEW_SECRET_TOKEN', 'ANY_RANDOM_STRING');
Next.js:
// .env
WORDPRESS_PREVIEW_SECRET = 'ANY_RANDOM_STRING'
Next Steps
Now that WordPress is ready, head on over and set up the Frontend to continue.